How do I organise the tables?
Create the tables, seat guests by family with one tap, and share each person's table by QR code.
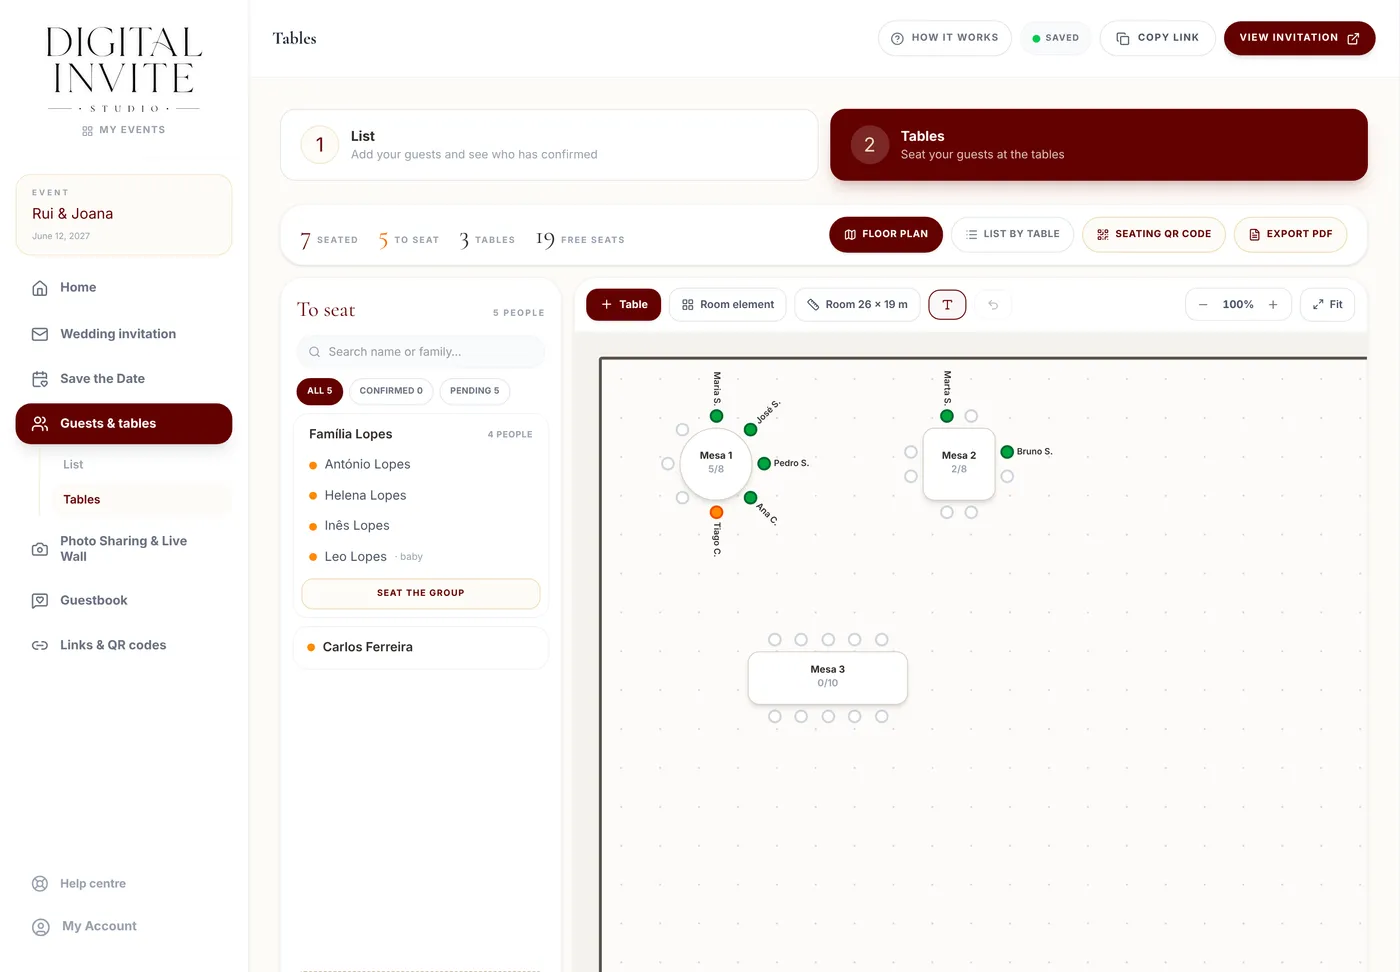
Step by step
- 1
Open Guests & tables and the Tables tab.
- 2
Click Table and choose the shape: Round, Square, Long, Imperial (with seats at the ends), Oval or Head table (everyone on one side). The new table appears in a free spot and opens so you can give it a name and its Seats.
- 3
To make the plan match the real room, click the Room … m button and enter its width and length. If your venue gave you a floor plan, add it with Upload image: it becomes the background and you place the tables on top.
- 4
With Room element add the dance floor, the stage, the bar, the buffet, walls, windows, the entrance, pillars or a text. Drag each piece into place, pull its corner to resize it and, in the panel, change its name and its size in metres, or use Rotate, Duplicate and Delete.
- 5
Drag the tables to the right spot on the floor plan. Use −, + and Fit to zoom in or see everything.
- 6
To seat lists guests without a table, by family. Tap a guest, or Seat the group, and then the table: tables where they fit are highlighted. On a computer you can also drag the name onto the table.
- 7
Each seat shows the (abbreviated) name of whoever is sitting there. If the plan gets crowded, switch them off with the Names button.
- 8
To choose someone's exact seat (for example, the children next to their parents), pick the guest or the group and then tap a free seat at the table: the group takes the following seats. Or drag the name onto the seat. In an open table, the number next to each name changes the seat (if it's taken, the two swap).
- 9
Tap a table to open it: change its name, Shape and Seats, rotate it, use Duplicate or Delete, move someone to another table with Move… or remove them with ×. Add guests lets you pick several people at once.
- 10
On a phone you work from the List by table: tap a table and Add guests, or open the card with the guests to seat and choose the table.
- 11
Follow the counters at the top (seated, to seat, tables, free seats) and export everything with Export PDF: the floor plan and the list by table, with dietary requirements for the caterer.
Tips
- Undo reverts the last seat change or table move.
- Guests who decline free up their seat automatically.
- A table won't take more people than its seats, and you can't reduce the seats below the number of people already seated.
- Seating QR code gives you the Digital Seating Chart QR code: guests check their table on their phone at the entrance, without crowding round a printed board.
- Once you define the room, guests also see the floor plan with their table highlighted (no other guests' names). To hide it, switch the option off under the Room … m button.
- The ruler in the corner of the plan shows the scale. A round table for 8 is about 1.9 m across.